Dichen 6th Gen HDMI
Table of contents
This guide will cover the cabling and setup process for the dichen 6th gen hdmi fuser.
Resolution check
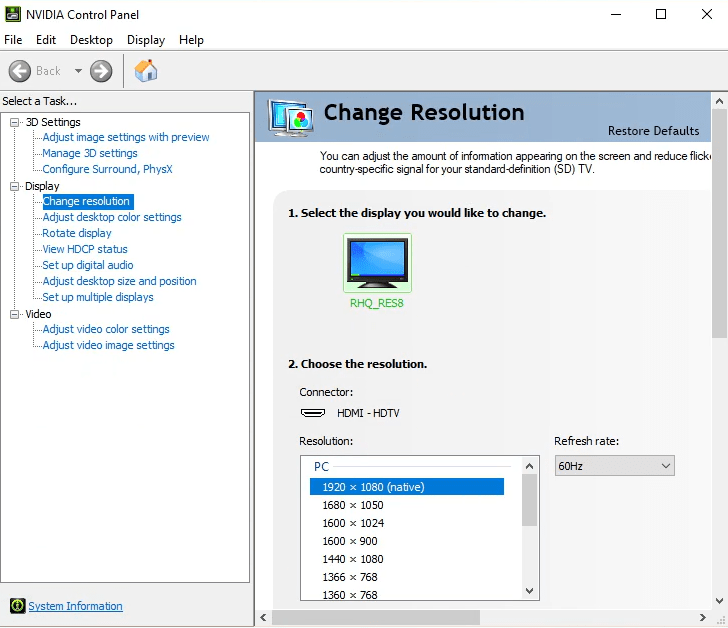

Before doing anything with the fuser. Ensure that the two systems you intend on using with the fuser are set to the same resolution and refresh rate.
Hardware Install

- Plug your main display that you intend on using throughout your experience to the BLUE indicated HDMI port.
- From your main PC plug a HDMI cable from either your GPU or motherboard into the YELLOW labeled HDMI port.
- From your 2nd PC plug a HDMI cable from either your GPU or motherboard into the GREEN labeled HDMI port.
- Using the provided power cable, plug in the Fuser to the RED colored power port.
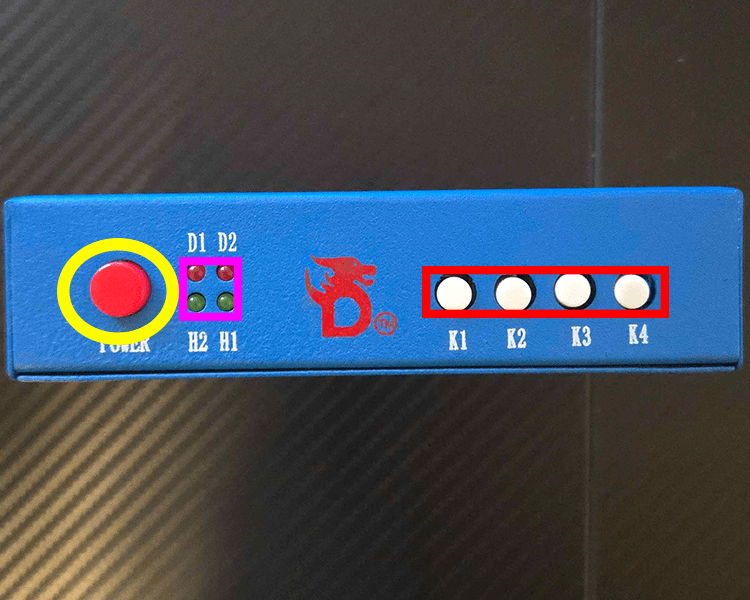
YELLOW: Power button for the fuser
PINK: Status lights
- D1: Power; Faded red when the fuser is off/standby. Bright red when the fuser is turned on.
- D2: Active fusion; When the fuser is actively combining both displays, this light will be solid red, otherwise this light will not be on.
- H2: HDMI port 2 status (Green labeled port from above)
- H2: HDMI port 1 status (Yellow labeled port from above)
RED: Fuser control buttons
- K1: Change resolution.
- K2: Adjust lower layer display overlay strength.
- K3: Reset lower layer overlay strength.
- K4: Toggle between fusion, HDMI 1, and HDMI 2.
EDID Programming
This is only needed if you are having compatibility issues after doing the normal setup. Before starting, plug your programming pc into your main monitor using a HDMI cable. The programming pc can be any PC that is capable of reaching the desired resolution/hz you want to achieve (within the limits of what the fuser can output).
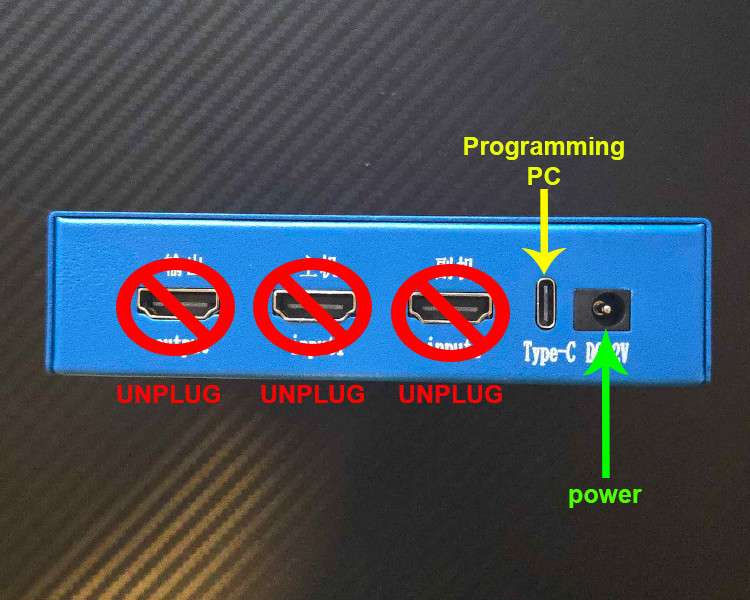
Unplug all HDMI cables from the fuser. Connect the YELLOW Type-C port to your programming PC. Ensure the power cable is connected to the fuser and turn the fuser on using the red power button in the front (not pictured).
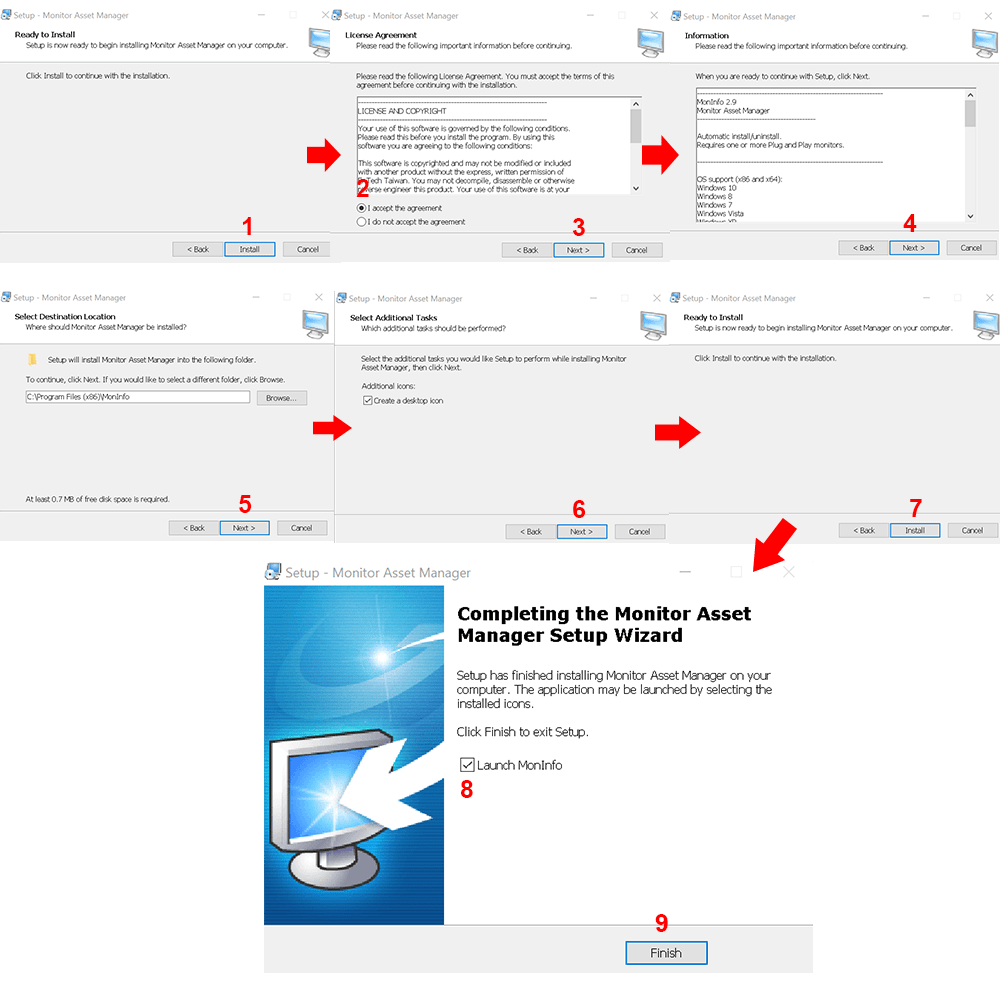
On your programming pc, download and extract the Dichen Programming.zip folder to the desktop. Open the MonitorAssetManager installer.exe and follow the steps above to install MonitorAssetManager.
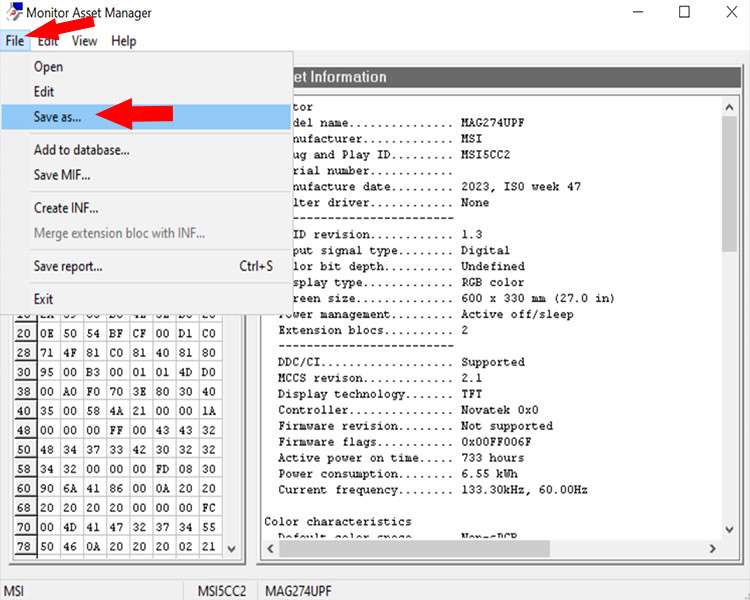
Within Monitor Asset Manager, drop down the file menu and click “Save as…”
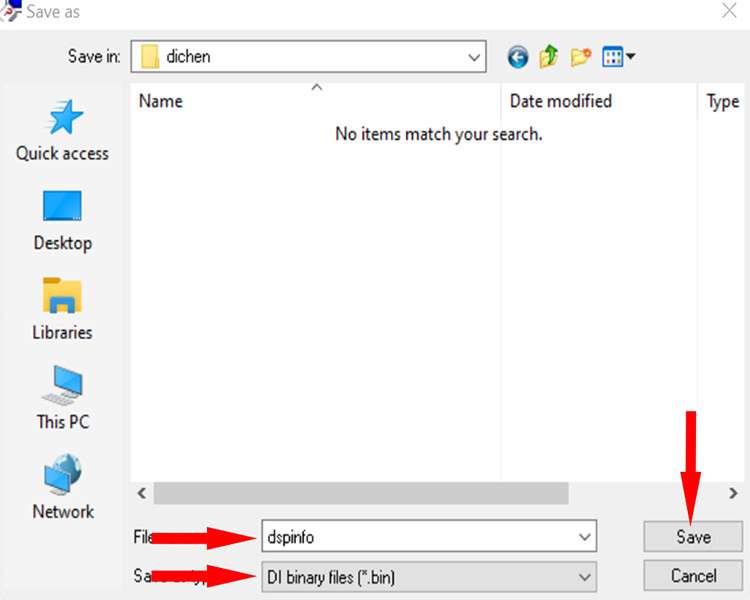
Save the file to the same location you extracted the .zip to (for easy access).
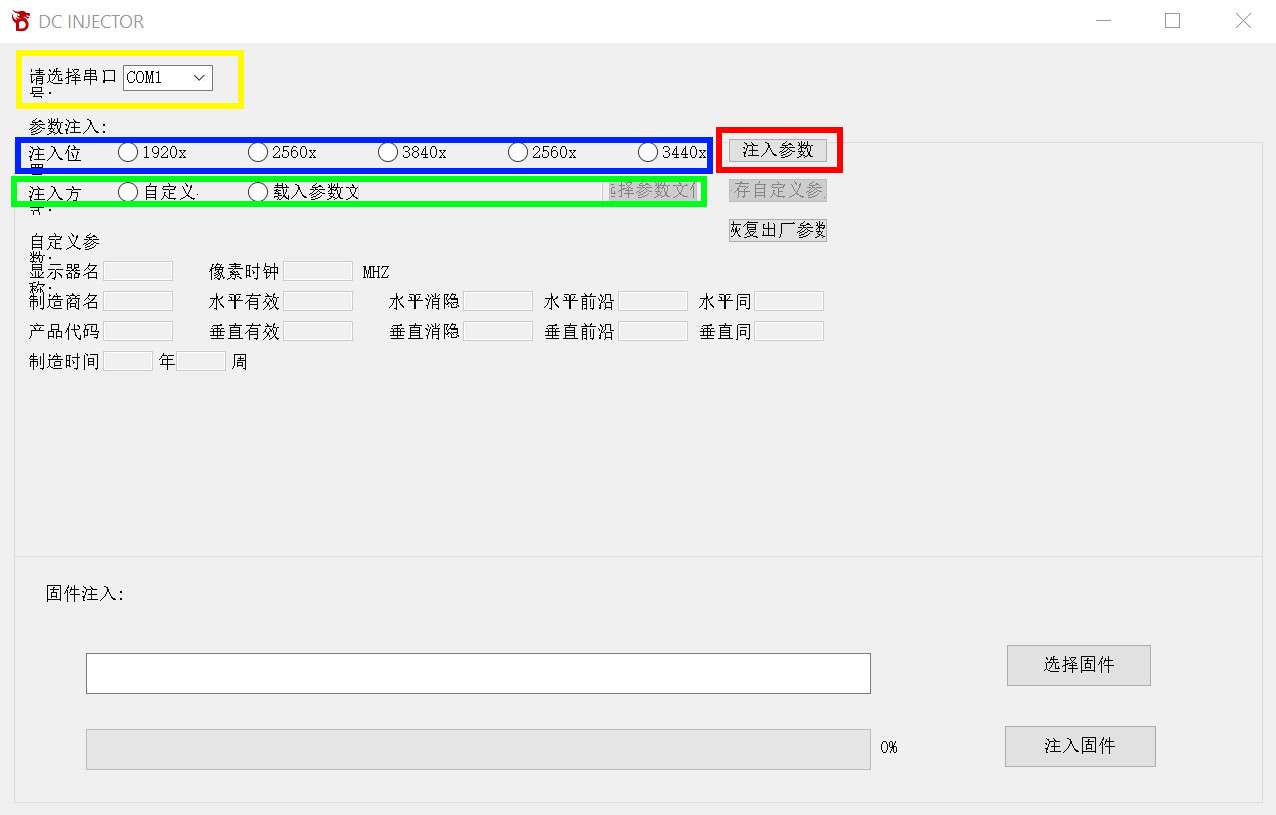
Open the EDID Flash Tool.exe and follow below:
- YELLOW: Select the COM port for the dichen fuser, this can be found in device manager under ports (COM).
- BLUE: Select your target resolution
- Green: Check the radio button the the RIGHT and then click the button that enables after checking the radio button. Locate your monitor file you saved from able and open it in DC Injector.
- RED: Click this button last to send the EDID to the fuser.
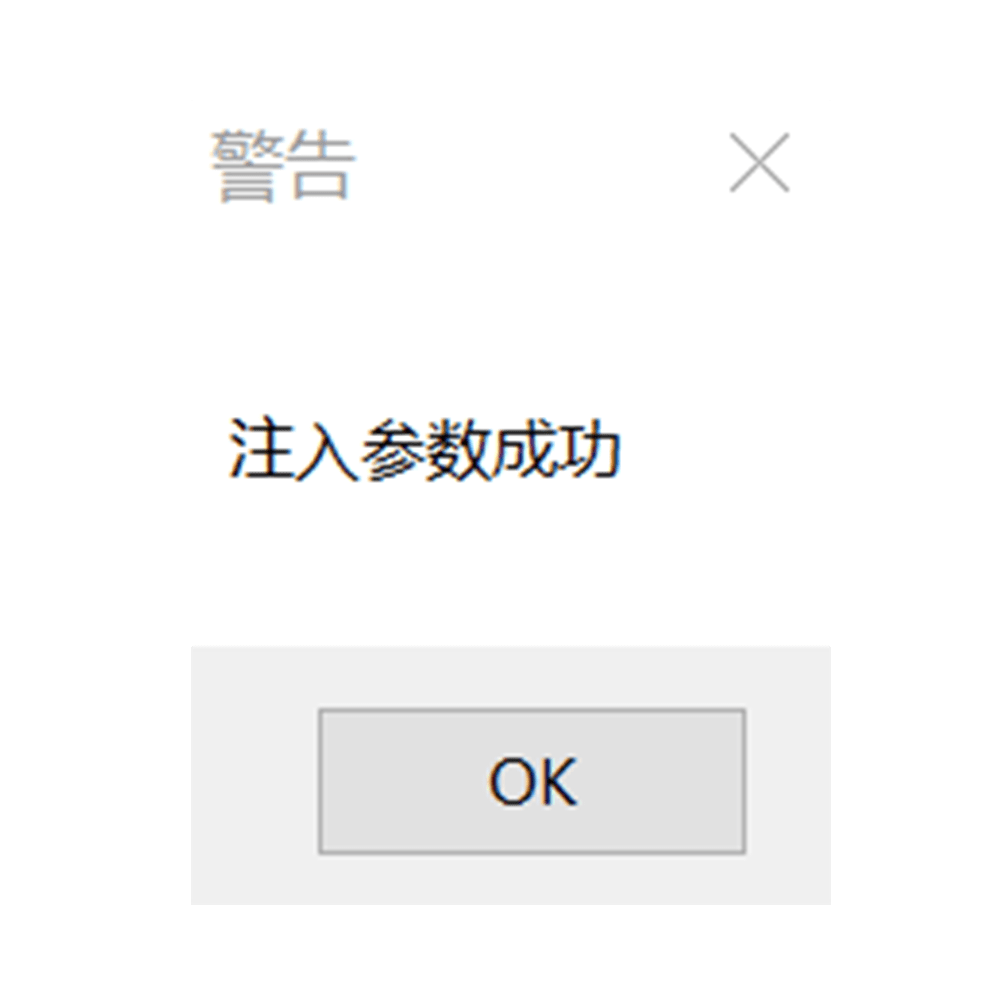
If the programming is successful, you will get the message above. Otherwise please contact us.
Troubleshooting
Pink/Purple hue on screen
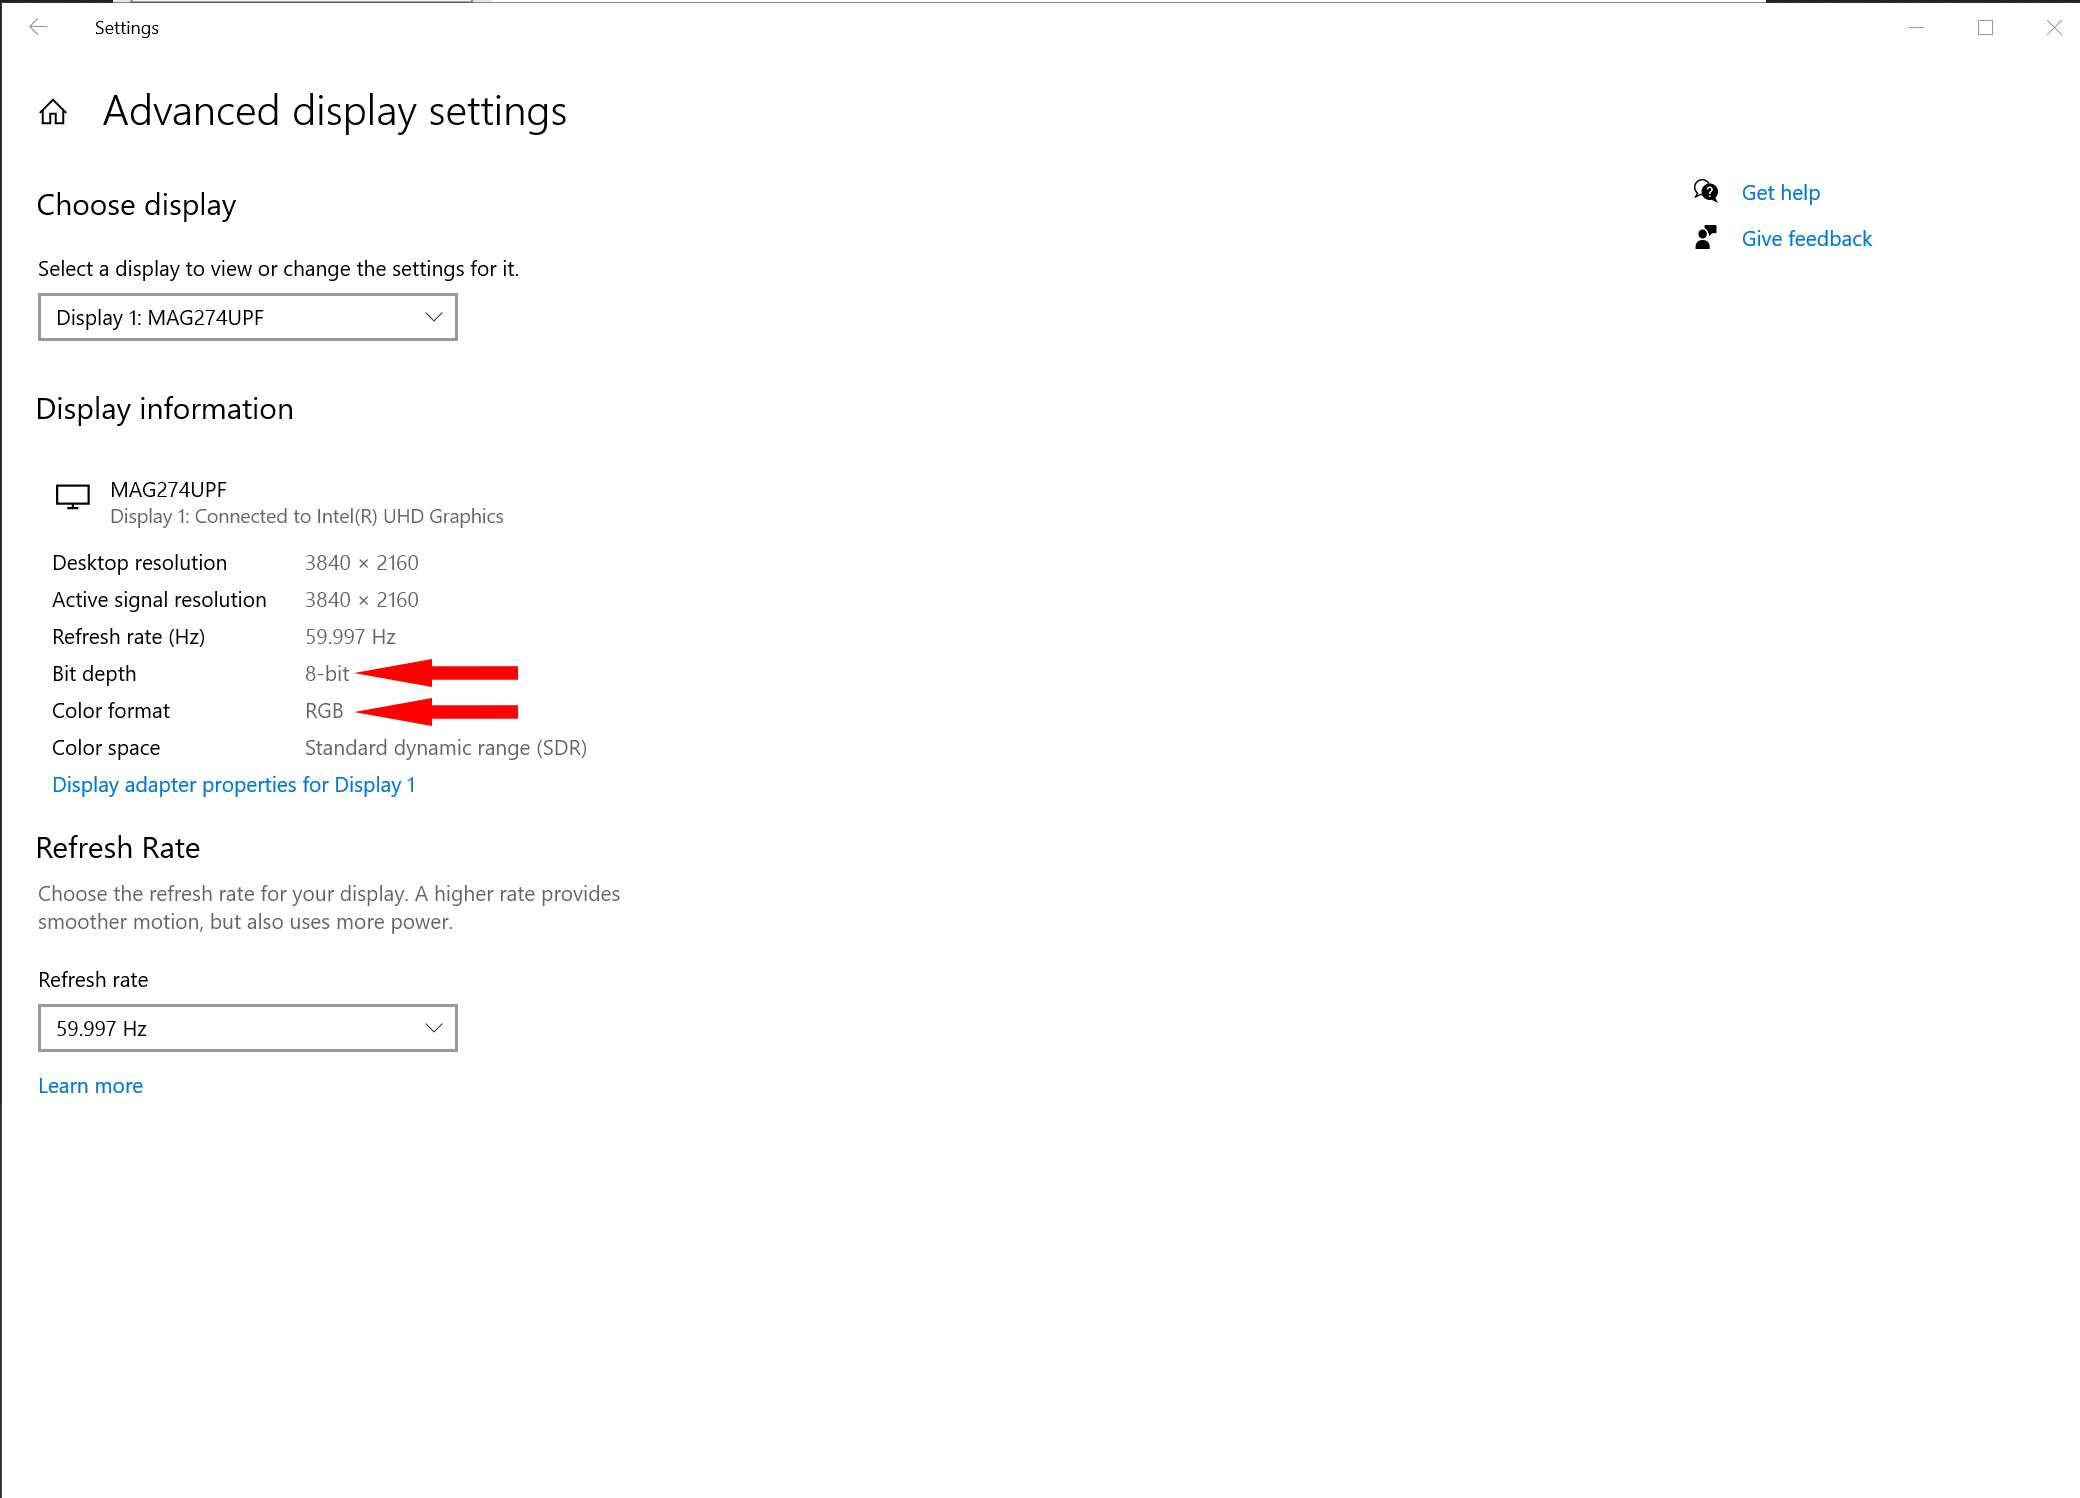
If you have a colored hue after setting up your fuser on one of your displays, ensure that both (mainly the display with the hue) displays are set to 8-bit depth and RGB color format. These settings can be changed in your gpu/cpu control panels.
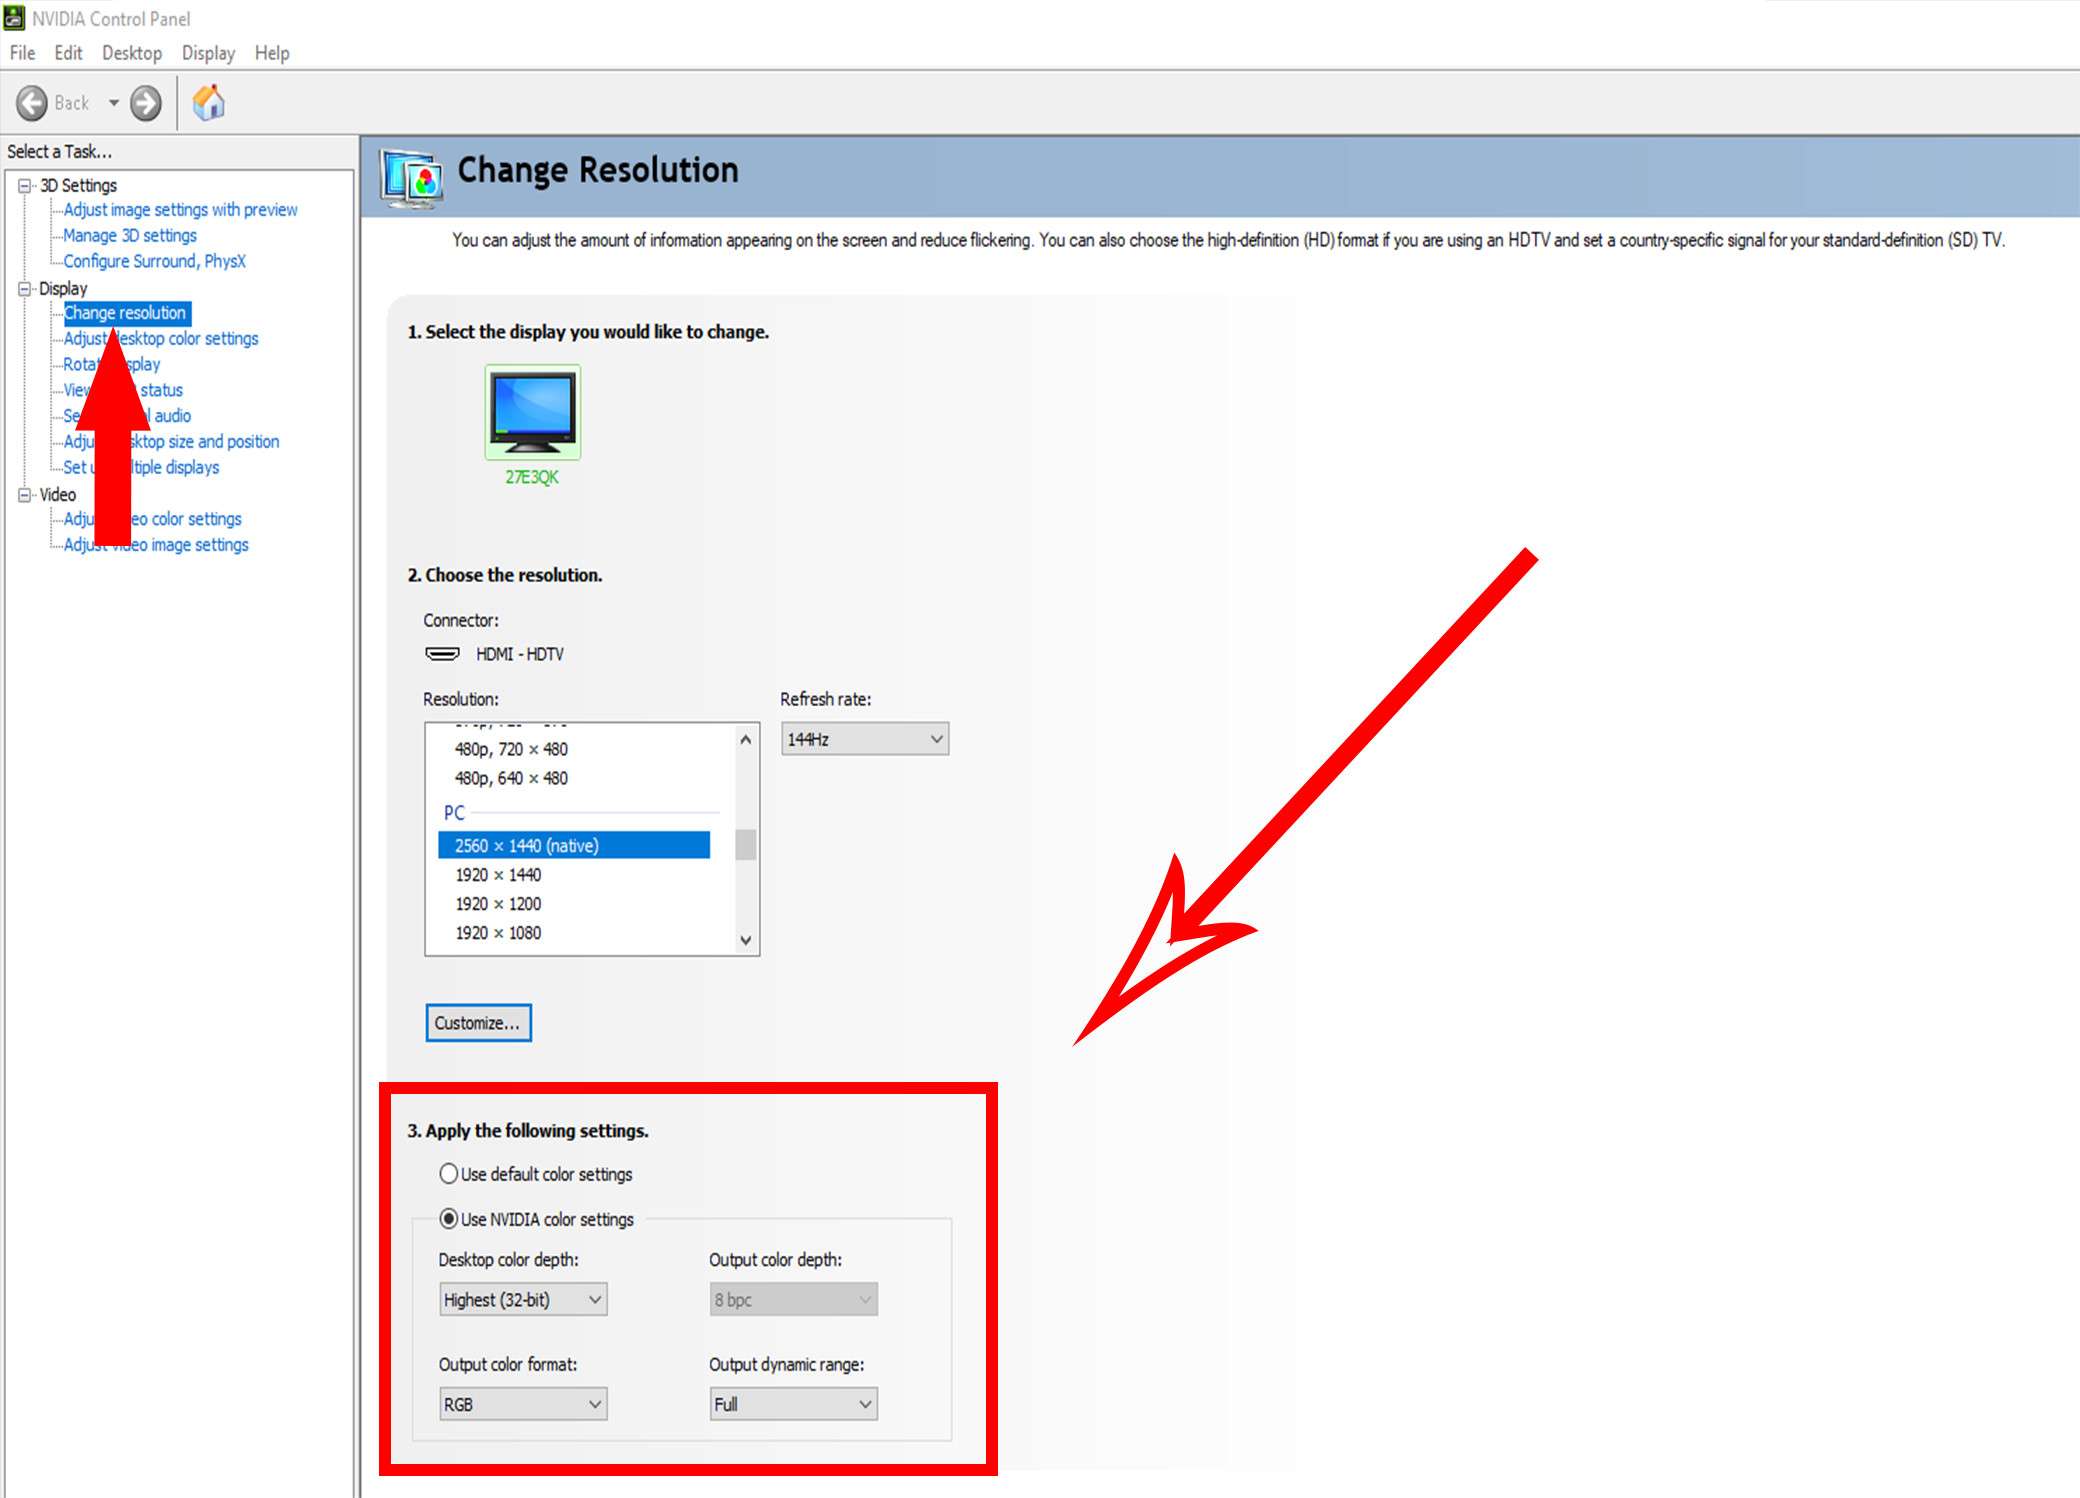
NVIDIA Control Panel Example

AMD Control Panel Example
Issues after EDID Programming
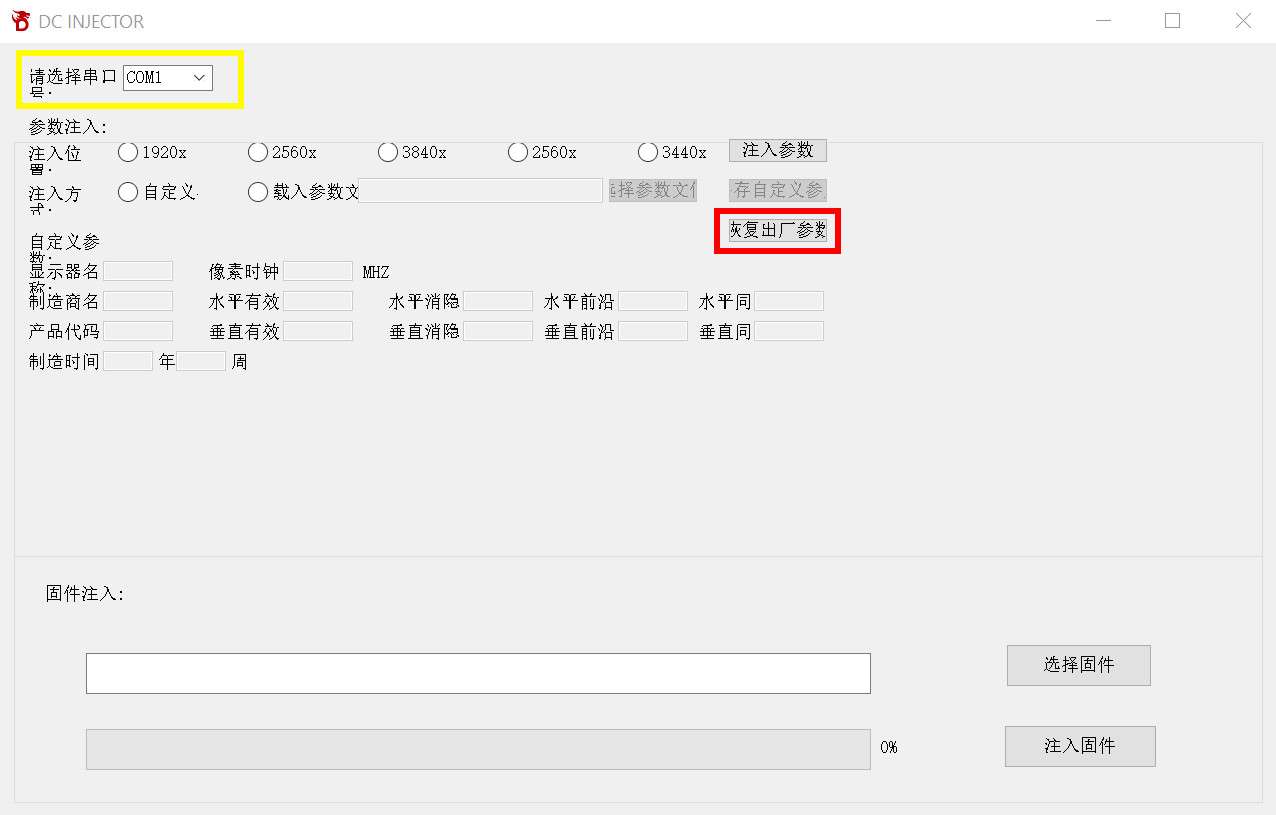
If you are having issues after EDID programming, follow below:
- Connect the type-c to your programming pc
- Open the EDID Flash Tool.exe
- Yellow: Select the COM port for the fuser serial
- Red: Do not select any radio options and click the red button represented in the image,
- Reach out to support here to resolve any issues that were not fixed from or caused by EDID programming.
Conclusion

Active display fusion is indicated by all four lights on the front panel being active. This concludes the instructions for the Dichen 6th Gen Fuser. If you have any questions or issues please reach out to us here.


